Quickly set up an API using shared flows
This chapter lets you quickly set up an API using shared flows.
The API contains the following:
-
Logging of request, error response, timestamps and API details
-
Apikey validation
-
Quota
-
Spike arrest
-
OPTIONS call support, CORS
-
Reformatting of the default Apigee errors
CORS headers are added via a flow hook on the proxyEndpoint response flow on all the APIs within WPP organization.
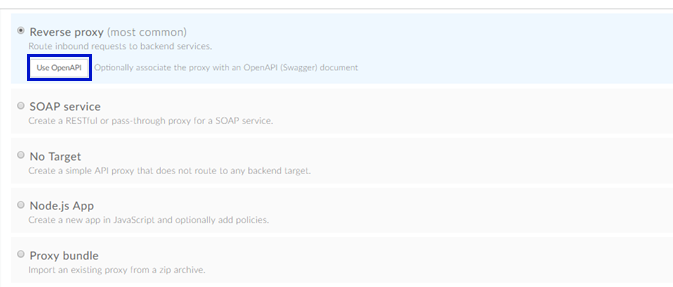
Generate the API in Apigee
-
Go to the API Proxies overview
-
Select + Proxy
-
Choose Reverse Proxy
- To use an OpenAPI specification, select Use OpenAPI and upload the file.
-
Select Next.
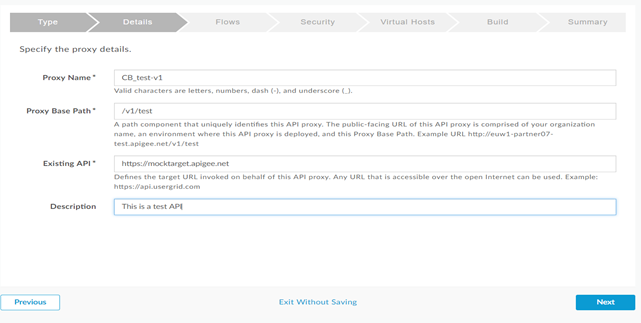
Configure API details
-
Enter the Name, Base Path, Target URL, and Description.
-
Select Next.
-
Configure flows
-
If you're using an OpenAPI spec, select your method as required.
tipApigee auto-generates conditional flows for selected methods.
-
If you're not using a spec, skip this step.
-
Select Next.
Set authentication
- Choose Pass through for security.
Don't apply authorization or browser options. Shared flows will handle auth and CORS.
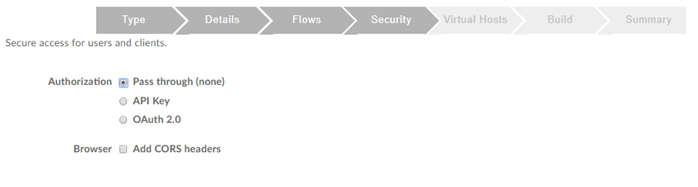
- Select Next.
Choose virtual host
-
Select secure.
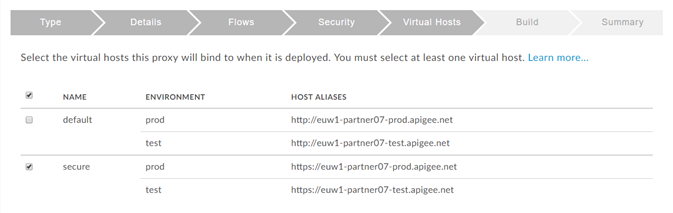
-
Select Next.
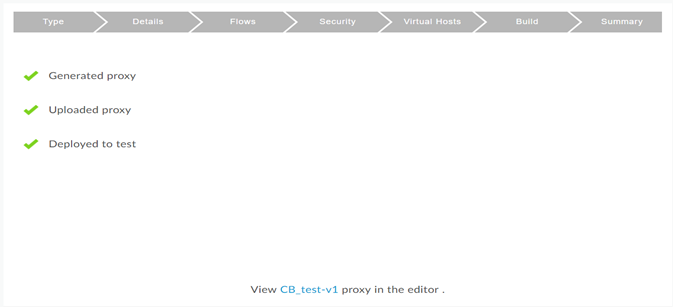
Select environment
-
Deploy the API to the test environment.
-
Select Build and Deploy.

Your proxy is now live in the editor.
Apply standard configurations
Now that you’ve created the base API, it’s time to add shared flows and essential policies.
Plan conditional flows
-
Always define a conditional flow for each method or path.
-
Click + under the Proxy or Target endpoint to add a conditional flow.
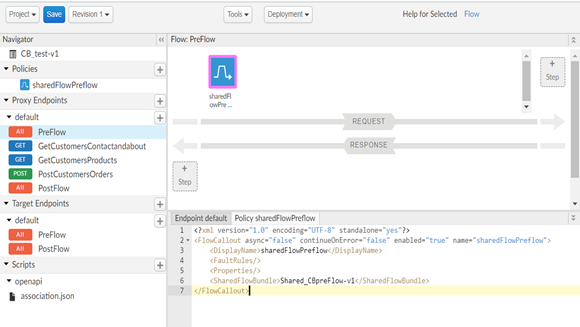
Add shared flows
-
Go to Proxy Endpoint > PreFlow (Request).
-
Select + Step.
-
Add a Flow Callout policy.
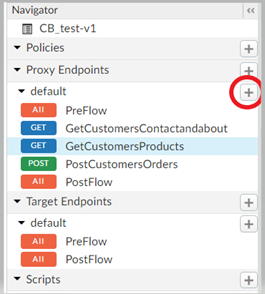
-
Use the flow named shared_CBpreFlow-v1.
-
Follow naming conventions (e.g., sharedFlowNameInCamelCase).

This shared flow has a quota policy. Define the quota in the API product or the default (2000 calls/day) will apply.
- Add the Shared_CBfaultRule-v1 flow to the Fault rules section in the Proxy Endpoint. This will reformat the Apigee default error responses.
- Create a flow callout policy that is called sharedFlowfaultRule that references this flow.
<ProxyEndpoint name="default">

  <Description/>

  <FaultRules>

    <FaultRule name="setBody">

      <Step>

        <Name>FC_sharedFlowFaultRule</Name>

      </Step>

    </FaultRule>

  </FaultRules>

  <PreFlow name="PreFlow">
-
Add the Fault rules section with the policy on it before the PreFlow.

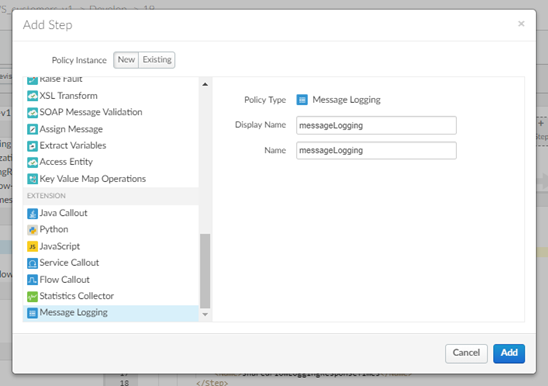
Add policies
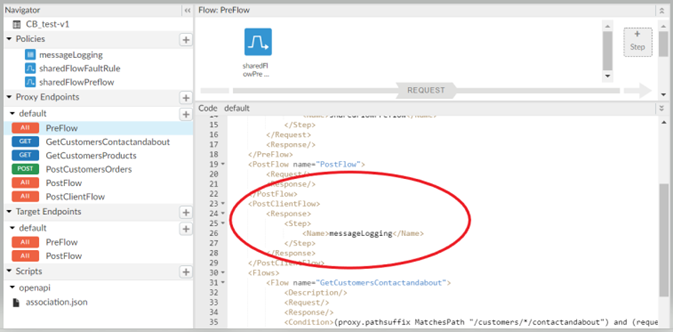
Add a Message Logging policy to PostClientFlow. First, create the policy.
-
Click on the “+” icon (see red circle).

-
Add the message logging policy.
<MessageLogging async="false" continueOnError="false" enabled="true" name="ML_messageLogging">

  <DisplayName>ML_messageLogging</DisplayName>

  <FaultRules/>

  <Properties/>

  <BufferMessage>false</BufferMessage>

  <Syslog async="true">

    <FormatMessage>true</FormatMessage>

    <Host>logs-01.loggly.com</Host>

    <Message>[ TheLogglyAppId@41058 tag="AT"] {messageLogging}</Message>

    <Port>6514</Port>

    <Protocol>TCP</Protocol>

    <SSLInfo>

      <Enabled>true</Enabled>

      <IgnoreValidationErrors>false</IgnoreValidationErrors>

    </SSLInfo>

  </Syslog>

  <IgnoreUnresolvedVariables>true</IgnoreUnresolvedVariables>

  <logLevel>INFO</logLevel>

  <NotificationIntervalInSec>0</NotificationIntervalInSec>

</MessageLogging>
Add the policy to the Post Client Flow. This flow is placed after the Post flow in the Proxy Endpoint.
</PostFlow>

<PostClientFlow>

  <Response>

    <Step>

      <Name>ML_messageLogging</Name>

    </Step>

  </Response>

</PostClientFlow>
FlowHook_CBPostProxy-v1 runs on the Proxy Endpoint Postflow and populates message logging variables.
Finalize the API
Polish your API by customizing headers and flows for backend compatibility.
Checklist before finalizing
-
Add required headers or key-value maps for your backend.
-
Remove sensitive response headers using the Assign Message policy.
-
Use Assign Message > Remove to strip them.
-
Add transformation policies for XML to JSON or vice versa.
-
Implement caching where needed.
-
Define a quota in the product if needed.
-
Check if the default spike arrest in shared_preFlow-v1 is sufficient.
The shared_preFlow-v1 quota policy uses the product’s quota. Without it, the default (2000/day) applies.
Your API setup is now complete and production-ready!